
The first steps
IoT-ing a mountain’s hut off-grid solar power system
In this post I explore my first steps for my project:
- GPRS connection
- MQTT over GPRS
- Current and Voltage sensing
GPRS connection and display
The first thing I wanted to explore was the GPRS connection. I already had a GPRS Shield from Seeed Studio in my tinkering box for quite a while, but I have not really used it yet. I combined it with an Arduino UNO and a Nokia 5110 display to start the exploration.
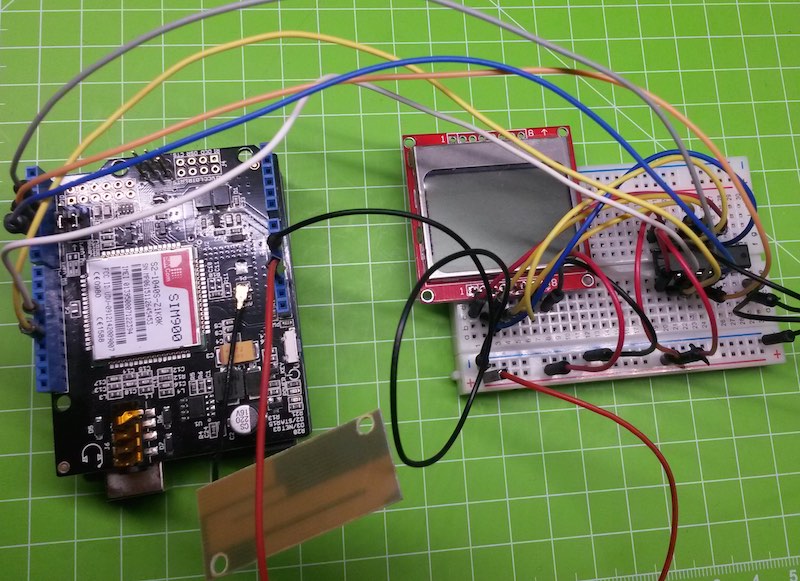
After some try and errors with the AT commands modem interface of the GPRS Shield my first sketch connects to Cellular GSM network and displays the signal strength (RSSI).
So I packed everything in my backpack, and since there is nearly no snow till now this winter, I just needed my hiking shoes to reach the hut and checked the signal strength at the huts solar control box.
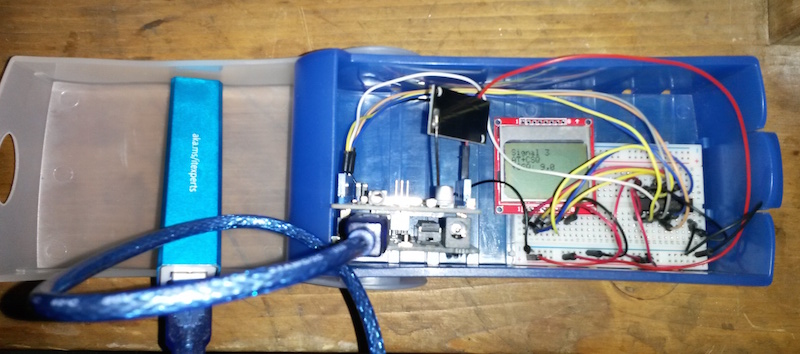
The display showed a strength of 9 (-95 dBm) to 10 (-93 dBm) which is just at the border from a Marginal to a OK Condition. Therefore a data connection should work but maybe a another/better antenna could be useful.
MQTT over GPRS
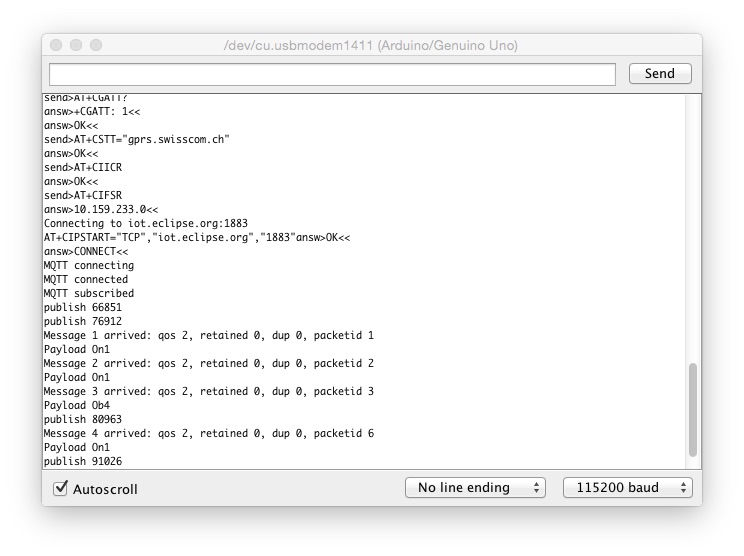
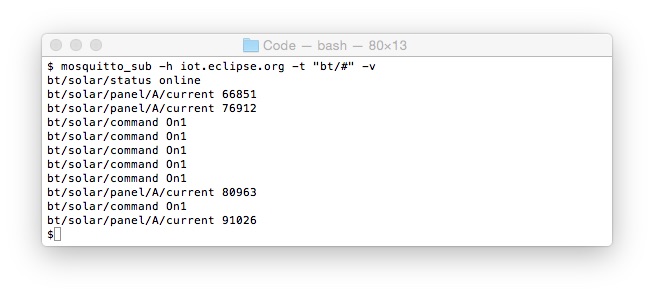
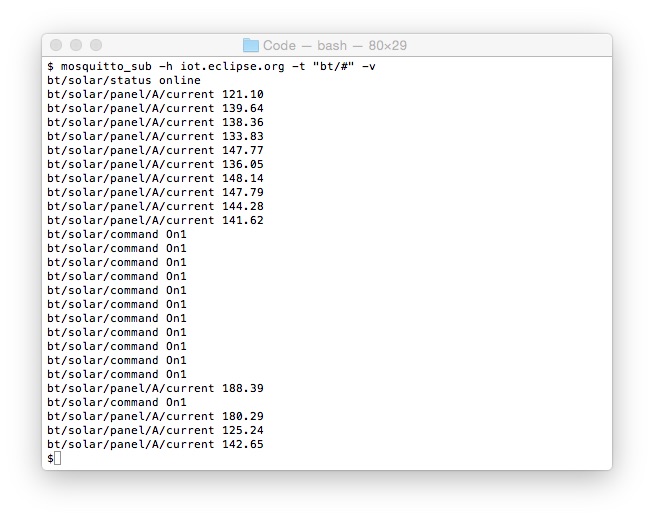
So back at my desk the next thing was to use MQTT to actually send some data over Cellular GSM network. I used the Paho Embedded MQTT C/C++ Client for Arduino, therefore I implemented a GPRSClient that extends the Arduino Client Base class which represents the Ethernet Interface for Arduino and is used by the Paho client library. This Sketch uses the GPRSClient and the Paho client library to send some data to the Paho sandbox server.
Current and Voltage sensing
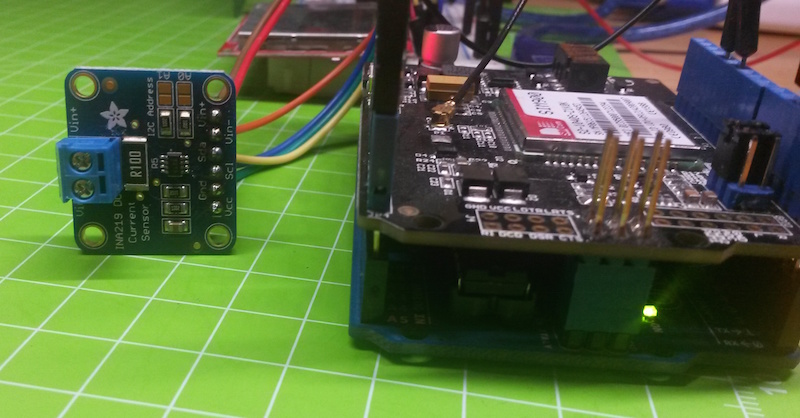
Next thing is to measure a current and send it, instead of the timer value. I use a INA219 High Side DC Current Sensor Breakout that can out of the box measure a current up to 3.2A and a Voltages up to 26V. This is fine for my first steps, where I just measure the current of the Arduino UNO and the GPRS Shield itself, but I will have to use another current sense resistor to extend the range up to 20A.
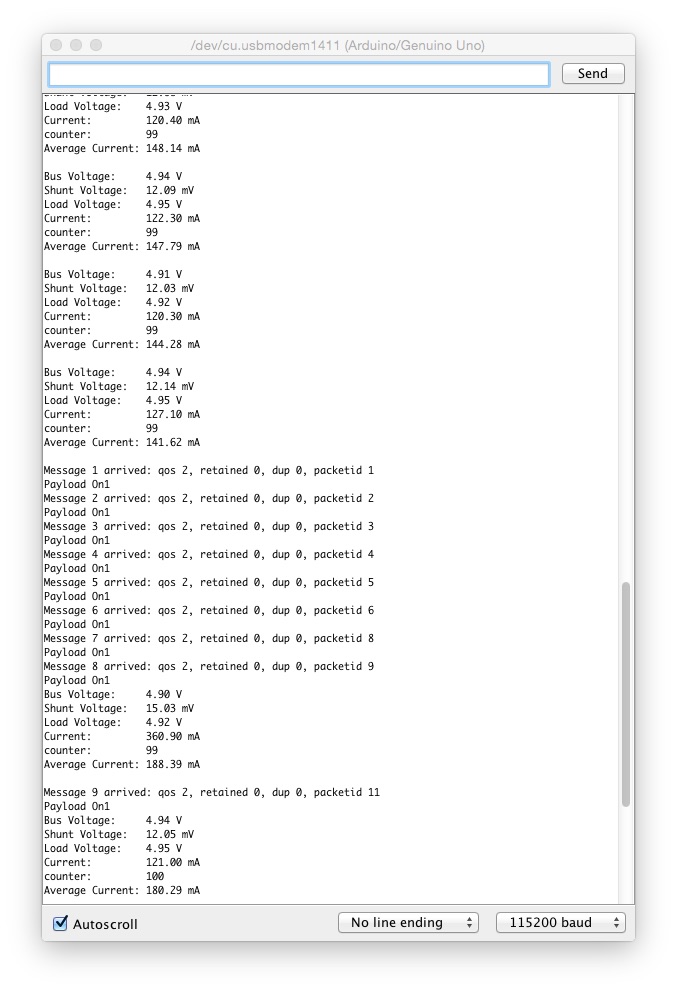
This Sketch uses the INA219 to measure the current roughly all 100ms and then publishes all 10s the average current. An we see that the Arduino UNO and the GPRS Shield use about 150mA when connected and about 180mA when it also has to receive some MQTT messages.
So after this first steps I draw some conclusions on how to continue. I will write about them in the next post.