My first steps with Eclipse Kura
Creating a maker friendly DIY IoT home automation solution
When I started this project I did not know anything about Kura besides its slogan which sounds like a perfect match to build my MQTT-SN gateway.
Kura is a Java/OSGi-based framework for IoT gateways. Kura APIs offer access to the underlying hardware (serial ports, GPS, watchdog, GPIOs, I2C, etc.), management of network configurations, communication with M2M/IoT Integration Platforms, and gateway management.
It’s also a couple of years ago since I worked with OSGI, Java and Maven and it’s also my first encounter with Tycho. So a lot of unknowns and challenges to tackle. I progressed quickly with the Kura Hello World Example but then my progress quickly slowed down.
But lets start from the beginning.
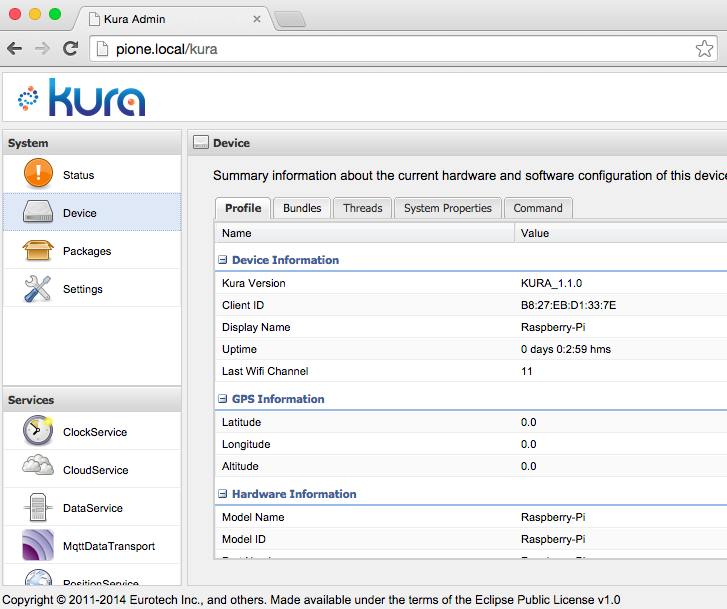
I started by installing the Kura framework on my Raspberry Pi according to the Raspberry Pi Quick Start using the Kura 1.1.1 Extended Downloads packages. Unfortunately the first time I installed the wrong package Raspbian (with Web UI) - Stable. Installing it changed the network configuration on my pi and therefore my pi was not available on my WLAN anymore. So back to the start, uninstall the package re-setup the network configuration for my WLAN and then install the Raspbian (No, Net, with Web UI) - Stable package. This time it worked out of the box.
Next I set up the Kura Development Environment according to the Getting Started guide. Then I followed the Hello World Example and was able to deploy the Hello World Deployment Package to my pi.
Next I created a GPIO Hello World using a GPIOPin from the jdk.dio to turn a LED on when the bundle is started and off again when the bundle is stopped:
public class LedHelloWorld {
  private static final Logger LOG = LoggerFactory.getLogger(LedHelloWorld.class);
  private GPIOPin mLed;

  protected void activate(ComponentContext componentContext) {
      try {
        mLed = DeviceManager.open(18);
        mLed.setDirection(GPIOPin.OUTPUT);
        mLed.setValue(true);
      } catch (Exception e) {
        LOG.error("LED on failed ", e);
      }
    }

    protected void deactivate(ComponentContext componentContext) {
      try {
        mLed.setValue(false);
        mLed.close();
        mLed = null;
      } catch (Exception e) {
        LOG.error("LED off failed ", e);
      }
    }
}
This compiles in Eclipse, but when I tried to build of the Deployment Package the build failed with:
# 2/7/15 4:35:16 PM CET
# Eclipse Compiler for Java(TM) v20140902-0626, 3.10.0, Copyright IBM Corp 2000, 2013. All rights reserved.
----------
1. ERROR in .../HelloOsgi.java (at line 9)
  import jdk.dio.ClosedDeviceException;
         ^^^^^^^
The import jdk.dio cannot be resolved
----------
2. ERROR in .../HelloOsgi.java (at line 10)
  import jdk.dio.Device;
         ^^^^^^^
The import jdk.dio cannot be resolved
...
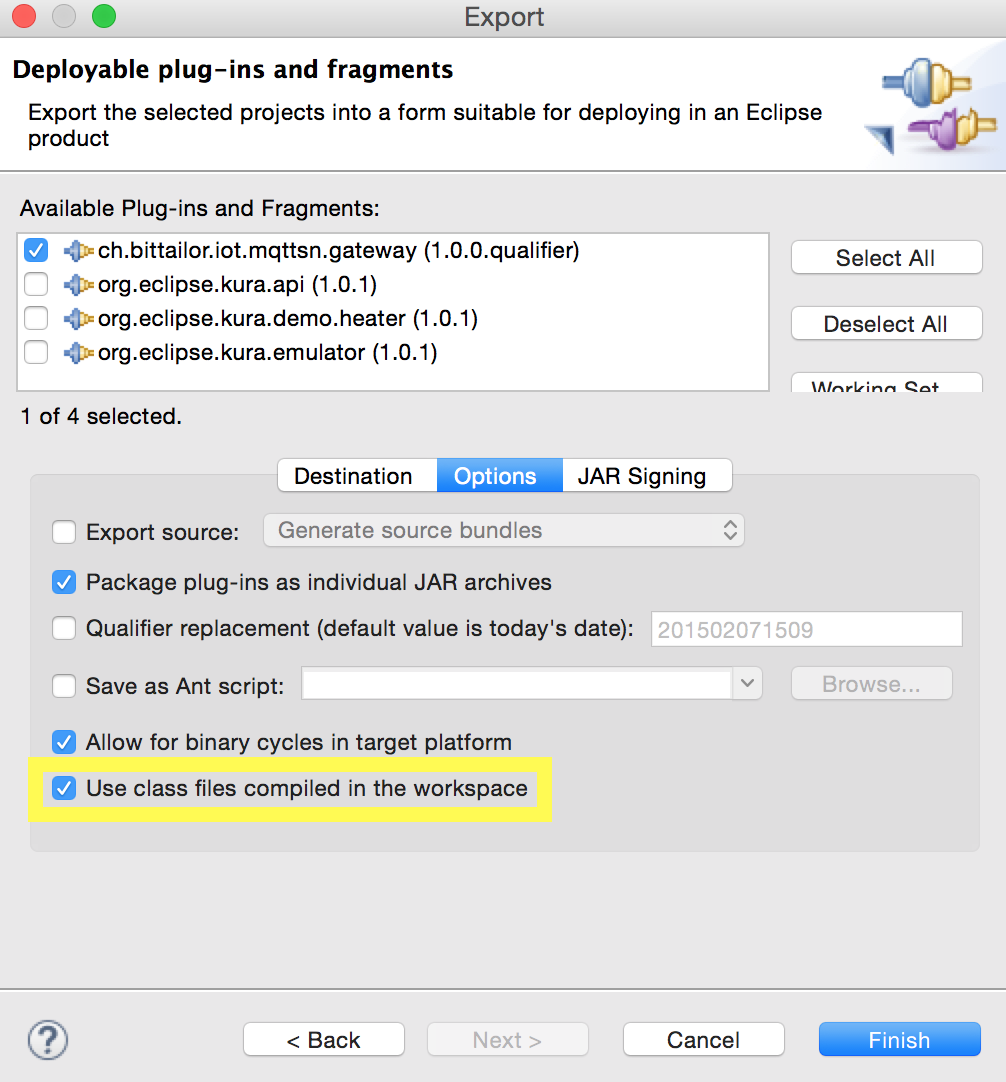
I asked the Kura discussion forum for help, but for the Deployment Package I did not find any solution. The only workaround I found was for exporting an OSGI bundle. This build also fails with the same errors, but there is an option to reuse the class files already compiled in the workspace and since it builds inside of eclipse the export of the OSGI bundle worked by enabling this option.
Now when I start this bundle on my pi the LED turns on and when I stop the bundle the LED is turned off.
Next is using a SPIDevice from the jdk.dio to control the nRF24L01+ transceiver. So here is my first SPI Hello World I tried:
public class NRF24HelloWorld {
  private static final Logger LOG = LoggerFactory.getLogger(LedHelloWorld.class);

  private static final byte CMD_R_REGISTER = 0x00;
  private static final byte CMD_NOP = (byte) 0xFF;
  private static final byte REGISTER_RX_ADDR_P0 = 0x0A;
  private static final byte REGISTER_RX_ADDR_P1 = 0x0B;
  private static final byte MASK_REGISTER_CMD = 0x1F;

  protected void activate(ComponentContext componentContext) {
    new Thread(new Runnable() {
      @Override
      public void run() {
        try {
          readAddress();
        } catch (Exception e) {
          LOG.error("readAddress failed ", e);
        }
      }
    }).start();
    ;
  }

  protected void deactivate(ComponentContext componentContext) {
  }

  private void readAddress() {
    LOG.info("readAddress");
    SPIDeviceConfig config = new SPIDeviceConfig(0, 0, SPIDeviceConfig.CS_ACTIVE_LOW,
      8000000, 3, 8, Device.BIG_ENDIAN);

    try (SPIDevice spi = DeviceManager.open(SPIDevice.class, config);
         GPIOPin power = DeviceManager.open(27);) {
      power.setDirection(GPIOPin.OUTPUT);

      power.setValue(true);
      LOG.info("power is on wait 2000ms");
      Thread.sleep(2000);

      ByteBuffer addressP0 = readRegister(spi, REGISTER_RX_ADDR_P0);
      LOG.info("address P0 is 0x{}", bytesToHex(addressP0.array()));
      ByteBuffer addressP1 = readRegister(spi, REGISTER_RX_ADDR_P1);
      LOG.info("address P1 is 0x{}", bytesToHex(addressP1.array()));

      LOG.info("just wait 2000ms");
      Thread.sleep(2000);

      power.setValue(false);
      LOG.info("power off and wait 2000ms");
      Thread.sleep(2000);

    } catch (Exception e) {
      LOG.error("Failed ", e);
    }
  }

  private ByteBuffer readRegister(SPIDevice spi, byte iRegister)
    throws UnavailableDeviceException, ClosedDeviceException, IOException {
    byte cmd = (byte) (CMD_R_REGISTER | (iRegister & MASK_REGISTER_CMD));
    ByteBuffer txBuffer = ByteBuffer.wrap(new byte[] { cmd, CMD_NOP, CMD_NOP, CMD_NOP, CMD_NOP, CMD_NOP });
    ByteBuffer rcBuffer = ByteBuffer.allocate(6);
    spi.writeAndRead(txBuffer, rcBuffer);
    rcBuffer.rewind();
    LOG.info("read register status is {}", rcBuffer.get());
    return rcBuffer.slice();
  }

  final protected static char[] hexArray = "0123456789ABCDEF".toCharArray();
  public static String bytesToHex(byte[] bytes) {
    char[] hexChars = new char[bytes.length * 2];
    for (int j = 0; j < bytes.length; j++) {
      int v = bytes[j] & 0xFF;
      hexChars[j * 2] = hexArray[v >>> 4];
      hexChars[j * 2 + 1] = hexArray[v & 0x0F];
    }
    return new String(hexChars);
  }
}
This time it failed when starting the bundle:
java.security.AccessControlException: access denied jdk.dio.spibus.SPIPermission '0:0' open
  at java.security.AccessControlContext.checkPermission(AccessControlContext.java:364)
  at java.security.AccessController.checkPermission(AccessController.java:555)
  at com.oracle.dio.spibus.impl.SPISlaveImpl.<init>(SPISlaveImpl.java:78)
  at com.oracle.dio.spibus.impl.SPIDeviceFactory.create(SPIDeviceFactory.java:46)
  at com.oracle.dio.spibus.impl.SPIDeviceFactory.create(SPIDeviceFactory.java:37)
  at jdk.dio.DeviceManager.openWithConfig(DeviceManager.java:290)
  at jdk.dio.DeviceManager.open(DeviceManager.java:610)
  at jdk.dio.DeviceManager.open(DeviceManager.java:560)
...
I again asked the Kura discussion forum for help. In the mean time I checked that the SPI master driver is enabled on my pi, it was enabled. I also tried to open a I2CDevice, that worked so just the SPIDevice did not work. I then discovered, that there is an error in the jdk.dio.policy shipped with Kura. After fixing this problem, my SPI Hello World worked and I could read the default addresses from nRF24L01+ transceiver over SPI. Therefore I answered my forum question myself, opened a bug and created a pull request on Kura to fix it. And my pull request even got merged into the Kura develop branch, that’s open source .
After the Hello Worlds I’m ready to start implementing the nRF24L01+ controller and the sensor area network on top of it. For this I decided use Tycho/Maven so its possible to build it outside of the IDE and introduce Continuous Integration. Not sure it was the right decision since I still fight with Tycho but at least it solved my import jdk.dio cannot be resolved build problem. More about my fights with Tycho in the next post. The code of my current work in progress can be found here @ .
I completely underestimated (as always) the time I need to implement the MQTT-SN gateway with the Kura framework. Good luck that the deadline for finalizing the IoT project has been extended:
We want to give you all a bit more time to work on your project, so we are happy to let you know that the new deadline for submitting your final entry for the challenge is now Monday, March 23.
So I’m confident that I’m able to submit something working by the March 23.